Article Plan: Rotator Cuff Physical Therapy Exercises PDF
This comprehensive guide details a structured rehabilitation program, utilizing a PDF format for convenient access to rotator cuff exercises,
promoting recovery and restoring optimal shoulder function through progressive phases.
Rotator cuff injuries are remarkably common, affecting millions annually, ranging from minor strains to complete tears. These injuries often stem from overuse, age-related degeneration, or acute trauma, significantly impacting daily activities and quality of life. Physical therapy is a cornerstone of rotator cuff rehabilitation, offering a non-surgical approach to pain management, restoring range of motion, and rebuilding strength.
A well-structured physical therapy program progresses through distinct phases, starting with pain reduction and gentle mobility exercises. As pain subsides, the focus shifts to strengthening the surrounding muscles and improving shoulder stability. Utilizing a PDF guide streamlines this process, providing patients with a readily accessible resource for exercises and instructions. This ensures consistency and empowers individuals to actively participate in their recovery journey. Ignoring proper form or attempting too much too soon can exacerbate the injury, highlighting the importance of guided rehabilitation.
Understanding the Rotator Cuff
The rotator cuff isn’t a single muscle, but a group of four muscles – supraspinatus, infraspinatus, teres minor, and subscapularis – that surround the shoulder joint. These muscles and their tendons work synergistically to stabilize the shoulder, enabling a wide range of motion, including rotation, lifting, and lowering the arm. They act as crucial dynamic stabilizers, preventing the head of the humerus from dislocating.
Understanding their function is vital for effective rehabilitation. Injuries often involve tears in the tendons, inflammation (tendinitis), or impingement – where tendons become compressed within the shoulder. A PDF guide detailing exercises should emphasize targeting all four muscles, not just the commonly affected supraspinatus. Proper rehabilitation aims to restore the balance of strength and flexibility within the rotator cuff, ensuring optimal shoulder mechanics and preventing future injuries. Ignoring scapular stability can hinder recovery.
Causes of Rotator Cuff Tears & Impingement
Rotator cuff injuries rarely stem from a single traumatic event; more often, they develop gradually due to overuse and age-related degeneration. Repetitive overhead motions, common in sports like baseball, tennis, and swimming, can contribute to tendon wear and tear. Impingement occurs when the rotator cuff tendons become compressed within the shoulder joint, often due to bone spurs or inflammation of the bursa.
A well-structured PDF guide should address these underlying causes. Poor posture, weak scapular stabilizers, and inadequate shoulder mechanics can exacerbate the problem. Overhead pressing or pulling performed incorrectly is a major culprit, potentially causing bone collisions and muscle strain. Understanding these factors is crucial for designing an effective rehabilitation program that focuses on restoring proper shoulder biomechanics and preventing recurrence. Addressing mobility limitations is also key.
The Role of a PDF Guide in Rotator Cuff Rehab
A Rotator Cuff Physical Therapy Exercises PDF serves as an invaluable tool for patients navigating rehabilitation, offering a readily accessible and portable resource. It allows individuals to consistently follow a prescribed exercise program outside of clinical sessions, enhancing adherence and accelerating recovery. The PDF format facilitates clear visual demonstrations of each exercise, ensuring proper form and minimizing the risk of re-injury.
Furthermore, a comprehensive PDF guide can detail progressive phases of rehab, outlining specific goals and timelines. It empowers patients to actively participate in their recovery, fostering a sense of ownership and motivation. The ability to reference exercises at any time, coupled with detailed instructions, promotes independent practice and long-term shoulder health. It’s a convenient way to track progress and understand the rationale behind each exercise.
Phase 1: Pain Reduction & Early Motion (0-4 Weeks)
The initial phase of rotator cuff rehabilitation focuses on minimizing pain and gently restoring early range of motion. Pendulum exercises are crucial, utilizing gravity to encourage movement without active muscle contraction. Passive Range of Motion (PROM) exercises, performed with assistance, further enhance flexibility and prevent stiffness.
Isometric exercises, involving muscle contractions without joint movement, are introduced to activate the rotator cuff muscles without exacerbating pain. These exercises build a foundation of strength while protecting the healing tissues; Avoid overhead movements initially, prioritizing pain-free motion. Consistency is key, but always listen to your body and avoid pushing through significant discomfort; This phase prepares the shoulder for more advanced exercises.
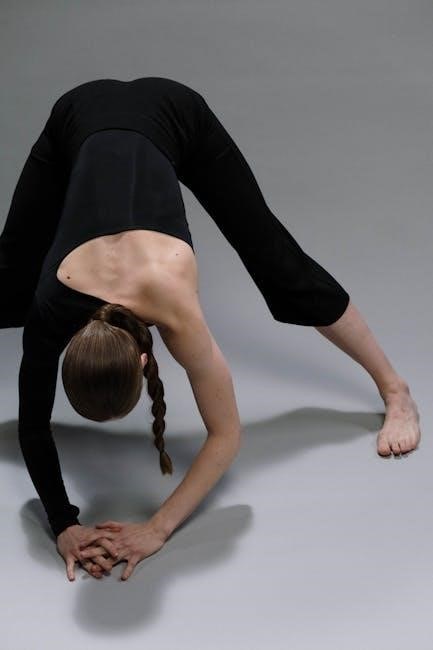
Pendulum Exercises
Pendulum exercises are a cornerstone of early rotator cuff rehabilitation, promoting gentle mobility and pain reduction. Lean forward, supporting yourself with your non-affected arm, allowing the injured arm to hang freely. Initiate small, circular movements – forward, backward, and side-to-side – using momentum rather than muscle power.
Gradually increase the range of motion as comfort allows, maintaining a relaxed shoulder. These movements mimic a pendulum, hence the name, and help to reduce stiffness and improve circulation. Perform 10-20 repetitions in each direction, several times a day. Avoid any sharp or shooting pain; the exercise should feel comfortable and controlled. This simple exercise is incredibly effective in the initial stages of recovery.
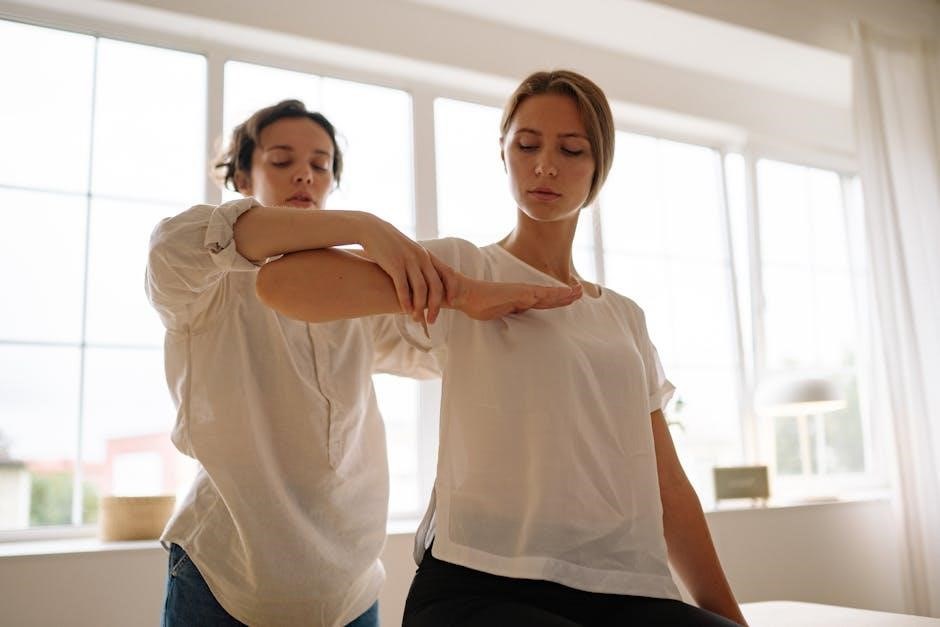
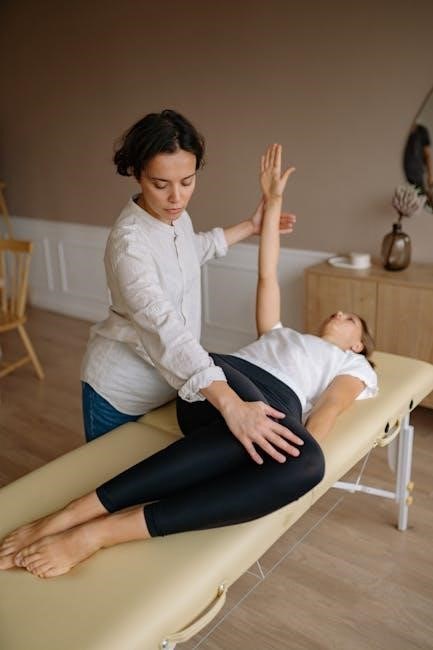
Passive Range of Motion Exercises
Passive range of motion (PROM) exercises are crucial for restoring shoulder flexibility when active movement is limited by pain or weakness. These exercises involve an external force – typically a therapist or your non-affected arm – gently moving your injured arm through its range of motion.
Common PROM exercises include external rotation, internal rotation, abduction, and flexion. The key is to relax the muscles of the injured shoulder while the external force guides the movement. Avoid forcing the joint beyond its comfortable limit; gentle stretching is the goal. Perform 10-15 repetitions of each exercise, 2-3 times daily. PROM helps prevent stiffness and prepares the shoulder for active movement later in rehabilitation.
Isometric Exercises for Rotator Cuff Muscles
Isometric exercises are foundational in early rotator cuff rehabilitation, strengthening muscles without joint movement. These exercises involve contracting the muscles against an immovable resistance, like a wall or your own hand. Focus on the supraspinatus, infraspinatus, teres minor, and subscapularis.
Examples include pressing your arm against a wall in various directions (forward, outward, inward), holding the contraction for 5-10 seconds. Another is attempting to externally or internally rotate your arm while holding it steady with your other hand. Perform 10-15 repetitions of each isometric exercise, several times a day. Isometric exercises help activate and stabilize the rotator cuff muscles, minimizing pain and preparing for more dynamic movements.
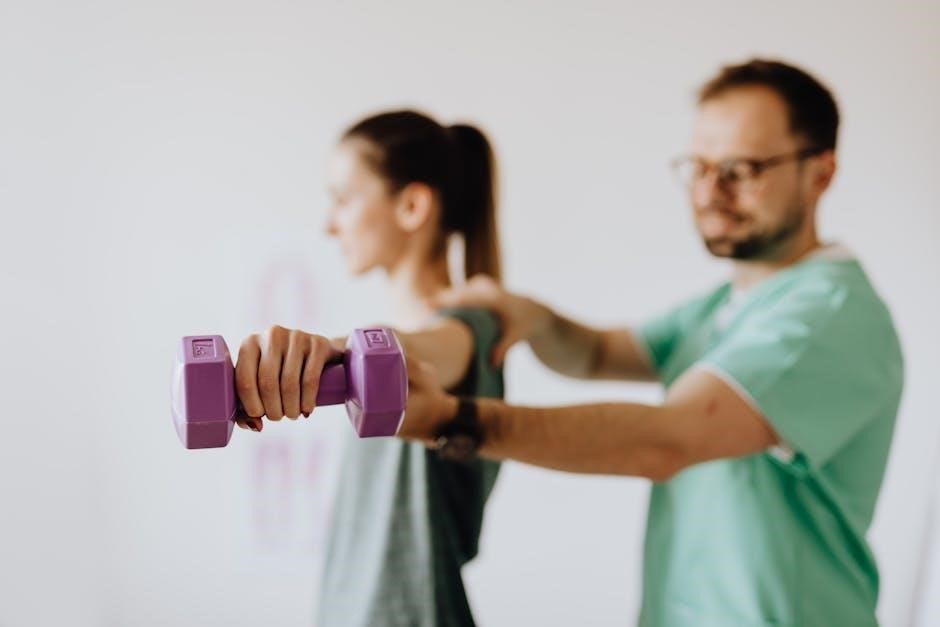
Phase 2: Restoring Range of Motion & Initial Strengthening (4-8 Weeks)
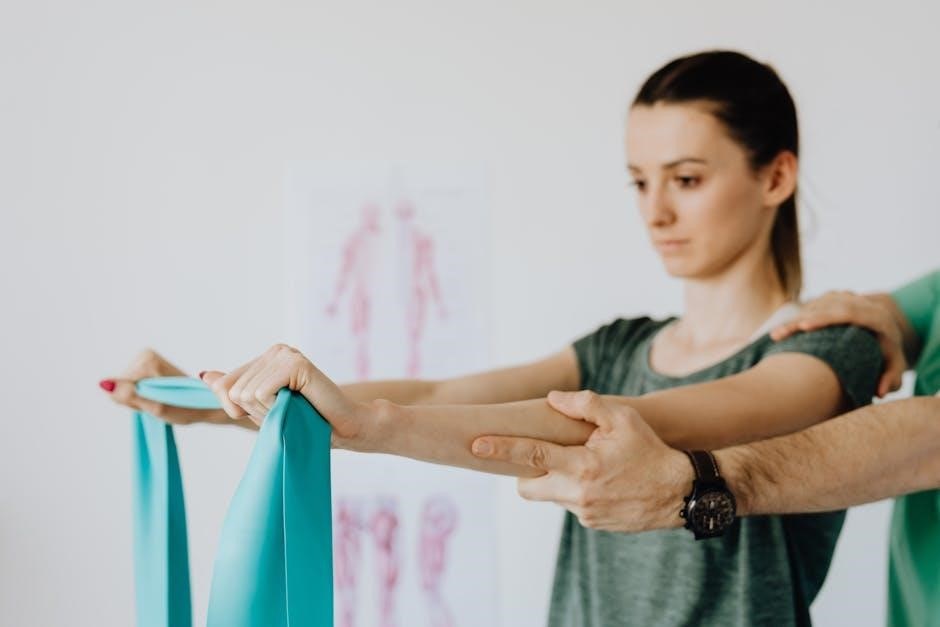
Phase 2 focuses on gradually increasing shoulder range of motion and initiating gentle strengthening exercises. This stage builds upon the pain reduction achieved in Phase 1. Resistance bands are excellent tools for controlled strengthening. Begin with external rotation exercises, anchoring the band and rotating your arm outward, maintaining good posture.
Internal rotation exercises follow a similar principle, rotating the arm inward. Scapular squeezes and rows are also crucial, strengthening the muscles that support shoulder blade movement. Perform 10-15 repetitions of each exercise, 2-3 times daily. Focus on controlled movements and avoid pain. Progress the resistance band level as strength improves.
External Rotation with Resistance Band
This exercise targets the infraspinatus and teres minor, key external rotator muscles of the shoulder. Secure a resistance band to a stable object at elbow height. Hold the band with your elbow bent at 90 degrees and tucked into your side. Slowly rotate your forearm outward, away from your body, keeping your elbow stable.
Focus on controlled movement and avoid shrugging your shoulder. Hold the extended position for a few seconds, then slowly return to the starting position. Begin with a light resistance band and gradually increase the resistance as your strength improves. Perform 10-15 repetitions, 2-3 sets, daily. Proper form is crucial to avoid re-injury.
Internal Rotation with Resistance Band
This exercise strengthens the subscapularis, the primary internal rotator of the shoulder. Anchor a resistance band to a stable object, positioning it at elbow height. Grasp the band with your elbow bent at 90 degrees and held close to your side. Slowly rotate your forearm inward, towards your body, maintaining a stable elbow position.
Concentrate on a smooth, controlled motion, preventing shoulder hiking. Pause briefly at the fully rotated position, then return slowly to the starting point. Start with a light band and progressively increase resistance as strength develops. Aim for 10-15 repetitions, completing 2-3 sets each day. Maintaining correct form is vital to prevent further injury.
Scapular Squeezes & Rows
These exercises focus on strengthening the muscles that control scapular movement, crucial for shoulder stability. For scapular squeezes, sit or stand with good posture. Gently pinch your shoulder blades together, as if trying to hold a pencil between them. Hold for 5 seconds, then relax. Repeat 10-15 times.
For rows, use a resistance band anchored in front of you. Pull the band towards your chest, keeping your elbows close to your body and squeezing your shoulder blades together. Maintain a straight back and avoid using momentum. Slowly return to the starting position. Perform 10-15 repetitions, completing 2-3 sets. These exercises improve posture and support rotator cuff function.
Phase 3: Strengthening & Endurance (8-12 Weeks)
This phase builds upon previous gains, focusing on increasing strength and muscular endurance of the rotator cuff and surrounding muscles. External rotation strengthening with dumbbells involves lying on your side with your elbow bent at 90 degrees; Slowly rotate your forearm upwards, keeping your elbow stable, and then lower it back down. Perform 10-15 repetitions.
Internal rotation uses a similar technique, rotating the forearm inwards. Prone horizontal abduction strengthens the rear deltoid and external rotators. Lie face down and lift your arm out to the side, keeping it straight. Complete 2-3 sets of each exercise, gradually increasing the weight or resistance as you progress.

External Rotation Strengthening with Dumbbells
This exercise targets the infraspinatus and teres minor, crucial for external rotation and shoulder stability. Lie on your side, supporting your head with a pillow. Bend your elbow to 90 degrees, keeping it tucked against your side; Hold a light dumbbell (1-3 lbs initially) in your hand.
Slowly rotate your forearm upwards, away from your body, maintaining a controlled movement. Focus on squeezing your shoulder blade slightly back and down. Hold the contracted position for 2-3 seconds, then slowly lower the weight back to the starting position. Perform 2-3 sets of 10-15 repetitions. Gradually increase the weight as strength improves.
Internal Rotation Strengthening with Dumbbells
This exercise strengthens the subscapularis, vital for internal rotation and preventing anterior shoulder instability. Lie on your side, opposite the shoulder you’re working, with a pillow supporting your head. Bend your elbow to 90 degrees, keeping it tucked against your side. Grip a light dumbbell (1-3 lbs initially).
Slowly rotate your forearm inwards, towards your stomach, maintaining control. Concentrate on keeping your elbow pinned to your side throughout the movement. Hold the peak contraction for 2-3 seconds, then gradually return to the starting position. Complete 2-3 sets of 10-15 repetitions. Increase weight progressively as strength develops.
Prone Horizontal Abduction
Prone horizontal abduction targets the posterior deltoid and external rotators, crucial for shoulder stability and preventing impingement. Lie face down on a bench or the floor, with your arm hanging relaxed towards the ground. Hold a light dumbbell (1-3 lbs) in your hand, palm facing down.
Keeping your elbow straight, slowly lift your arm out to the side, away from your body, maintaining a neutral wrist position. Focus on initiating the movement from your shoulder, not your arm. Hold the peak contraction for 2-3 seconds, then slowly lower your arm back to the starting position. Perform 2-3 sets of 10-15 repetitions, gradually increasing the weight as you gain strength.
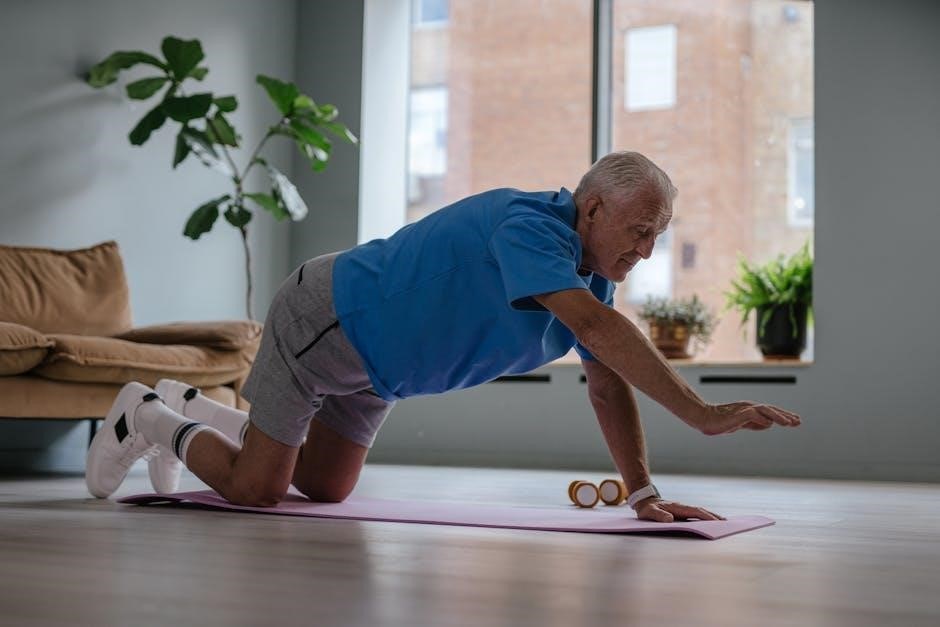
Advanced Exercises & Functional Training (12+ Weeks)
This phase focuses on regaining full shoulder function and preparing for return to activity. Overhead pressing requires caution; the bent press is a safer alternative, allowing heavier loads with reduced risk of impingement. Prioritize shoulder dislocates as a warm-up – 2 sets of 10 reps, slow tempo – to improve mobility.
Pull-ups, initiated from an active dead hang (not passive), build strength and stability. TRX/ring face pulls enhance scapular control, anchoring feet at a 30-45 degree incline. Focus on controlled movements and proper form. Progress to functional movements mimicking daily activities or sport-specific motions, gradually increasing intensity and complexity. Listen to your body and avoid pushing through pain.
Overhead Pressing Considerations & Bent Press
Overhead pressing is inherently complex and often performed incorrectly, leading to shoulder injuries. Bone collisions within the shoulder joint can damage surrounding muscles. Traditional overhead pressing with kettlebells may exacerbate issues; consider modifying or avoiding it. Angling the upper body doesn’t fully resolve the biomechanical stress.
The bent press offers a safer alternative, functioning as a press but with a unique movement pattern. It allows for heavier loads with reduced impingement risk. “Taming the Bent Press” by Dave Whitley is a valuable resource. Avoid strict one-arm presses or holding weight overhead with a single arm to promote recovery and prevent re-injury.
Pull-up Technique & Active Dead Hangs
Proper pull-up technique is crucial for shoulder health during rotator cuff rehabilitation. Focus on initiating the movement from an active dead hang, not a passive one. An active dead hang involves actively engaging the lats and scapular muscles before pulling. Even on the final repetition, descend into an active dead hang before releasing.
Many individuals lack the necessary shoulder mobility to pull effectively from a passive dead hang. Jump into the active dead hang, stabilize, and then initiate the pull-up. This ensures proper scapular engagement and reduces stress on the rotator cuff. Mastering this technique is paramount for safe and effective pull-up progression.
Shoulder Dislocates as Warm-up
Incorporating shoulder dislocates into your warm-up routine is a highly effective method for enhancing shoulder mobility and preparing the rotator cuff for exercise. Perform two sets of ten repetitions, utilizing a slow, controlled tempo of five seconds in each direction. Focus on feeling the scapula move upwards and downwards throughout the movement.
A slight shrug at the top of the movement allows for greater humeral movement and promotes optimal shoulder mechanics. This exercise helps to address common limitations in shoulder range of motion, which can contribute to rotator cuff issues. Prioritize controlled movements over speed to maximize benefits and minimize risk of injury.
Important Considerations & Precautions
When embarking on a rotator cuff rehabilitation program, prioritize listening to your body and avoiding movements that exacerbate pain. Progress gradually through the phases, increasing resistance and intensity only when comfortable. Maintaining proper form is crucial to prevent re-injury and maximize effectiveness. Avoid passive dead hangs initially; focus on active engagement of the shoulder muscles.
Be mindful of overhead pressing and pulling techniques, as improper form can easily lead to impingement. Consider alternatives like the bent press, which offers a safer overhead pressing option. If pain persists or worsens, discontinue the exercise and consult with a healthcare professional. Consistency is key, but avoid overtraining.
TRX/Ring Face Pulls for Scapular Stability
TRX or ring face pulls are invaluable for enhancing scapular stability, a critical component of rotator cuff rehabilitation. Anchor your feet and grab the handles, positioning your body at a 30-45 degree incline from the ground. Focus on retracting your scapula – squeezing your shoulder blades together – as you pull the handles towards your face.
Maintain a controlled tempo throughout the movement, emphasizing the scapular squeeze rather than simply pulling with your arms. This exercise strengthens the rear deltoids, rhomboids, and trapezius muscles, which support proper shoulder mechanics. Ensure your elbows remain high and flared out to maximize the activation of these muscles. Perform 3-4 sets of 10-15 repetitions.
Finding & Utilizing a Rotator Cuff Exercise PDF
Locating a reliable rotator cuff exercise PDF is a crucial step in self-guided rehabilitation. Numerous resources are available online, from physiotherapy clinics to reputable health websites. When selecting a PDF, prioritize those created by qualified professionals – physical therapists or orthopedic specialists. Ensure the PDF outlines a progressive exercise program, starting with pain reduction and gradually increasing in intensity.
A well-structured PDF will include clear instructions, illustrations, and modifications for different fitness levels. Always review the PDF with your healthcare provider before commencing any exercise program. Utilize the PDF as a guide, paying close attention to proper form and technique to prevent re-injury. Consistency is key; adhere to the recommended frequency and duration for optimal results.
When to Seek Professional Guidance
While a rotator cuff exercise PDF can be a valuable tool, it’s not a substitute for professional medical advice. Seek guidance from a physical therapist or orthopedic doctor if your pain is severe, doesn’t improve with home exercises, or worsens over time. Immediate consultation is necessary if you experience sudden weakness, numbness, or a popping sensation in your shoulder.
A professional can accurately diagnose the extent of your injury and tailor a rehabilitation program specifically to your needs. They can also identify any underlying issues contributing to your rotator cuff problem. Don’t hesitate to seek help if you’re unsure about proper exercise technique or experience any discomfort during exercises. Proactive professional care ensures a safe and effective recovery journey.