
Andersen 4000 Series Storm Door Installation: A Comprehensive Guide
This guide details installing Andersen 4000 Series storm doors‚ often completed in under 45 minutes. It covers preparation‚ frame installation‚ and hardware adjustments for a secure fit.
Understanding the Andersen 4000 Series
The Andersen 4000 Series storm doors represent a popular choice for homeowners seeking enhanced energy efficiency and protection. These doors are known for their durable aluminum frames and full-view glass options‚ maximizing natural light. Installation is designed to be relatively straightforward‚ often achievable within an hour with basic tools.
Key features include the Quick Change System‚ allowing easy switching between glass and screen panels. The series offers various models‚ including Easy Install options‚ simplifying the process further. Understanding the specific model and its components‚ as detailed in the installation manual‚ is crucial for a successful outcome. Proper preparation of the door opening and accurate measurements are also vital steps.
Key Features and Benefits
Andersen 4000 Series storm doors boast several key features enhancing home comfort and value. The prominent Quick Change System allows effortless transitions between glass and insect screen panels‚ offering year-round versatility. Durable aluminum construction ensures long-lasting performance and resistance to weather elements. Full-view glass maximizes natural light‚ brightening interiors while providing an unobstructed view.
Benefits include improved energy efficiency‚ reducing heating and cooling costs. These doors add an extra layer of security and protection against harsh weather. The Easy Install design simplifies the installation process‚ saving time and effort. Furthermore‚ Andersen’s reputation for quality ensures a reliable and aesthetically pleasing addition to any home.
Tools Required for Installation
Successful installation of your Andersen 4000 Series storm door requires a few essential tools. A measuring tape is crucial for accurate door opening dimensions. A level ensures the frame is perfectly aligned‚ preventing operational issues. A drill with appropriate drill bits is needed for securing the frame and hinges. A screwdriver‚ both Phillips and flathead‚ will handle various screws.
Additionally‚ a utility knife is useful for opening packaging and trimming weatherstripping. Safety glasses are paramount for eye protection during drilling and cutting. A hammer might be needed for minor adjustments. Depending on the installation‚ shims could be required to achieve a perfectly plumb and level fit. Having these tools readily available streamlines the process.
Safety Precautions Before You Begin
Prioritizing safety is essential before commencing your Andersen 4000 Series storm door installation. Always wear safety glasses to protect your eyes from debris during drilling and cutting. Work gloves will shield your hands from sharp edges and potential splinters. Ensure the work area is well-lit and free of obstructions to prevent trips and falls.
If using power tools‚ familiarize yourself with their operation and safety features. Disconnect power to any electrical circuits near the work area. When lifting the door slab‚ use proper lifting techniques to avoid strain. Be mindful of pinch points during frame and door handling. Following these precautions ensures a safe and successful installation process.
Preparing the Door Opening
Proper preparation involves checking door opening size and trim‚ ensuring adequate space for the storm door‚ and preparing the frame for installation.
Measuring the Door Opening Accurately
Accurate measurements are crucial for a successful Andersen 4000 Series storm door installation. Begin by measuring the width of the door opening at the top‚ middle‚ and bottom‚ recording the smallest dimension. Next‚ measure the height on the left‚ center‚ and right sides‚ again noting the shortest measurement.
These measurements determine the correct storm door size. Refer to the Andersen Storm Door to Door Opening Size Chart‚ often included with the product or available online‚ to select the appropriate model.
Pay close attention to any irregularities in the opening. If the opening isn’t perfectly square‚ use the smallest width and height measurements for ordering. Z-Bar extender kits may be needed for non-standard openings‚ ensuring a proper‚ weather-tight fit.
Checking for Adequate Space
Before installation‚ verify sufficient space around the door opening for the Andersen 4000 Series storm door. Ensure adequate depth exists to accommodate the door’s frame and hardware without interference. Check for obstructions like molding‚ trim‚ or doorbells that might hinder proper fitting or operation.

The manual emphasizes confirming the door opening and trim allow enough space. Insufficient space can lead to installation difficulties and compromise the door’s functionality.
Inspect for any protruding elements that could prevent the door from swinging freely or sealing correctly. Carefully assess the surrounding area to guarantee a smooth‚ unobstructed installation process‚ maximizing the storm door’s protective benefits.
Preparing the Door Frame
Proper door frame preparation is crucial for a successful Andersen 4000 Series storm door installation. Begin by thoroughly cleaning the existing door frame‚ removing any dirt‚ debris‚ or old paint that could impede a secure fit. Inspect the frame for damage‚ such as rot or warping‚ and address these issues before proceeding.
The installation manual highlights the importance of a sound‚ stable frame. If necessary‚ reinforce weak areas or replace damaged sections to ensure the storm door is mounted on a solid foundation.
Ensure the frame is square and plumb; any irregularities will affect the door’s operation and weather sealing. A well-prepared frame guarantees optimal performance and longevity of your new storm door.
Installation Steps: Frame Installation
Frame installation involves attaching the Andersen storm door frame to the prepared door opening‚ ensuring squareness and levelness for smooth operation and weather tightness.
Installing the Z-Bar (if required)
Determining Z-Bar necessity is crucial; consult the storm door opening size chart provided by Andersen. If the opening requires extension to accommodate the frame‚ Z-Bar kits are essential.
These extenders attach to the existing door frame‚ creating a flush mounting surface for the storm door. Installation typically involves pre-drilling pilot holes and securing the Z-Bar with screws.
Ensure the Z-Bar is consistently applied around the entire opening‚ maintaining a uniform gap for proper frame alignment. Use a level to verify the Z-Bar’s straightness before proceeding.
Incorrect Z-Bar installation can lead to alignment issues and air leaks‚ so meticulous attention to detail is paramount. Refer to the manual for specific Z-Bar kit instructions.
Attaching the Frame to the Door Opening
Carefully position the storm door frame within the prepared opening‚ ensuring it rests squarely against the door frame or installed Z-Bar. Begin by aligning the top corners‚ then gently lower the frame into place.
Secure the frame using the provided screws‚ starting with the top corners. Pre-drilling pilot holes is recommended to prevent wood splitting. Work your way down the sides‚ spacing screws evenly for uniform pressure.
Avoid over-tightening screws‚ as this can distort the frame. Maintain consistent pressure while securing each screw. Regularly check for squareness as you progress‚ making minor adjustments as needed.

A properly attached frame is the foundation for a weather-tight seal. Double-check all screws for tightness and ensure the frame is flush with the door opening.

Ensuring Frame Squareness and Level
Achieving a square and level frame is crucial for proper storm door operation and weather sealing. Use a carpenter’s square to verify that all corners are at 90-degree angles. Adjust the frame slightly by gently shimming behind the frame if necessary.

Employ a level along both the top and sides of the frame to confirm it’s perfectly horizontal and vertical. Minor adjustments can be made by loosening screws and re-tightening after shimming.
Consistent checking throughout the attachment process is vital. A slightly out-of-square frame can lead to difficulties with door alignment and locking mechanisms.
Take your time and prioritize accuracy during this step. A well-squared and leveled frame ensures a smooth‚ efficient‚ and long-lasting storm door installation.
Installing the Door Slab
Carefully attach the hinges to the door slab and then hang it within the installed frame. Precise alignment is key for smooth operation and weather protection.
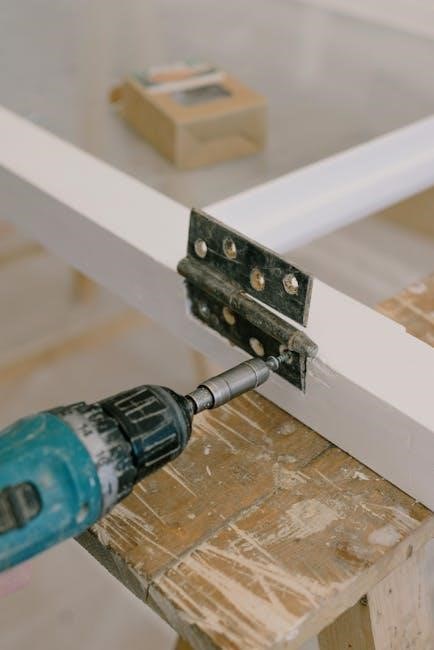
Attaching the Hinges
Begin by carefully positioning the hinges on the door slab‚ ensuring they align with the pre-drilled holes or designated locations. Andersen doors typically utilize a robust hinge system designed for smooth operation and long-lasting durability. Securely fasten the hinges using the provided screws‚ tightening them firmly but avoiding over-tightening‚ which could strip the screw holes.
It’s crucial to verify the hinges are flush with the door surface to prevent binding during installation. Some installations may require drilling additional pilot holes‚ especially if the pre-drilled holes are slightly misaligned. Remember to use appropriate drill bits for the door material to avoid splintering or cracking. A properly attached hinge is fundamental for the door’s functionality and longevity‚ ensuring effortless opening and closing.
Hanging the Door Slab in the Frame
Carefully lift the door slab and align the hinges with the corresponding mounting plates on the installed frame. Gently guide the door into the opening‚ ensuring the hinges engage smoothly with the frame’s receptacles. You may need a second person to assist with this step‚ particularly with heavier door models.
Once the door is partially seated‚ fully engage the hinges by gently pushing the door until it’s securely held in place. Verify the door slab hangs straight and doesn’t bind within the frame. If resistance is encountered‚ re-examine the hinge alignment and frame squareness. Proper hanging is vital for a weather-tight seal and effortless operation‚ preventing drafts and ensuring long-term performance.
Adjusting the Door for Proper Alignment
After hanging‚ assess the door’s alignment – look for even gaps around the perimeter. Andersen 4000 Series doors often feature adjustable hinges‚ allowing for fine-tuning. Use a screwdriver to adjust the hinge screws‚ carefully shifting the door’s position until consistent gaps are achieved.
If the door binds or rubs against the frame‚ further adjustments are necessary. Minor adjustments to the hinge screws can correct these issues. Ensure the door swings freely and latches securely. Proper alignment is crucial for effective weatherstripping and a tight seal‚ preventing air and water infiltration. Take your time and make small adjustments‚ checking the results after each change.
Hardware Installation & Adjustments
Install the handle‚ lockset‚ and closer following the manual’s instructions. Adjust the closer speed for smooth‚ controlled operation‚ ensuring secure latching every time.
Installing the Handle and Lockset
Begin by carefully aligning the handle and lockset components with the pre-drilled holes in the door slab. Securely fasten the handle using the provided screws‚ ensuring it’s snug but not overtightened to avoid damaging the door material. Next‚ install the lockset mechanism‚ paying close attention to the orientation of the strike plate – it must align perfectly with the receiving plate on the door frame for proper locking.
Refer to the Andersen 4000 Series manual for specific diagrams and torque specifications. Double-check that all screws are fully engaged and that the handle and lockset operate smoothly. A properly installed lockset provides both security and ease of use‚ contributing to the overall functionality of your new storm door. Test the locking mechanism several times to confirm its reliable operation.
Adjusting the Closer
The closer controls the speed at which the storm door returns to its closed position. Andersen 4000 Series doors feature adjustable closers‚ allowing you to customize the closing action. Locate the adjustment screws on the closer mechanism – typically‚ one controls closing speed‚ and another adjusts the latch speed.
Refer to the installation manual for specific instructions and diagrams. Begin by loosening the speed adjustment screw and incrementally increasing or decreasing the closing speed until it’s optimal. Then‚ adjust the latch speed to ensure a secure‚ yet gentle‚ closure. Avoid setting the closer too fast‚ as this could cause slamming and damage. Fine-tune the adjustments until the door closes smoothly and reliably.
Installing the Weatherstripping

Proper weatherstripping is crucial for an energy-efficient storm door‚ preventing drafts and water infiltration. Andersen 4000 Series doors typically come with pre-cut weatherstripping for the sides and top of the frame. Begin by thoroughly cleaning the frame surfaces where the weatherstripping will adhere‚ ensuring a clean and dry surface for optimal bonding.
Peel off the backing from the adhesive weatherstripping and carefully apply it to the frame‚ ensuring a tight seal. Pay close attention to corners and ensure there are no gaps. Some models may require cutting the weatherstripping to fit precisely. Inspect the bottom of the door for a sweep; ensure it’s properly installed and makes contact with the threshold for a complete seal.
Screen and Glass Panel Installation

Andersen’s Quick Change System simplifies panel swaps. Easily transition between the insect screen and glass panel in seconds‚ requiring minimal tools for convenient seasonal adjustments.
Quick Change System Overview
Andersen’s innovative Quick Change System is a hallmark feature of the 4000 Series storm doors‚ designed for effortless seasonal transitions. This system allows homeowners to easily switch between a full glass panel for enhanced visibility and warmth during colder months‚ and an insect screen for ventilation during warmer periods.
The system utilizes a simple‚ yet secure‚ locking mechanism. Panels are held in place by strategically positioned retainers‚ eliminating the need for numerous screws or complicated tools. Typically‚ the process involves releasing the retainers‚ lifting out the current panel‚ and inserting the desired panel – glass or screen – until it clicks securely into place.
This process takes less than a minute‚ making it incredibly convenient for adapting to changing weather conditions. The system is designed for durability and ease of use‚ ensuring years of reliable performance. Refer to the detailed diagrams in the installation manual for specific retainer locations and operating instructions.
Installing the Glass Panel
Before installing the glass panel‚ ensure the storm door frame is clean and free of debris. Carefully unpack the glass panel‚ inspecting it for any damage incurred during shipping. Align the glass panel with the storm door opening‚ ensuring the correct orientation – typically with any decorative features facing outward.
Engage the Quick Change System retainers‚ starting with the top retainers and working your way down. Gently push the glass panel into the frame until it clicks securely into place on all sides. Verify that the panel is fully seated and flush with the frame‚ without any gaps.
A properly installed glass panel will provide excellent insulation and clarity. If the panel doesn’t seat correctly‚ double-check the retainer positions and ensure no obstructions are present. Refer to the manual’s diagrams for visual guidance.
Installing the Insect Screen
To install the insect screen‚ begin by ensuring the storm door frame is clean and free of any obstructions. Carefully remove the glass panel using the Quick Change System‚ following the release instructions detailed in the manual. Unpack the insect screen‚ checking for any tears or damage to the mesh.
Align the insect screen with the storm door opening‚ ensuring the top retainers engage first‚ followed by the sides and bottom. Gently push the screen into the frame until it clicks securely into place‚ similar to the glass panel installation. Confirm the screen is taut and properly seated within the frame.
A correctly installed screen will provide effective insect protection. If issues arise‚ re-check the retainer engagement and ensure the screen is free from wrinkles or folds.
Final Checks and Troubleshooting
Post-installation‚ check for air leaks and proper alignment. Common issues include misalignment or improper weatherstripping; refer to the manual for adjustments and support.

Checking for Air Leaks
After completing the Andersen 4000 Series storm door installation‚ thoroughly inspect for any potential air leaks. A simple method involves closing the door and carefully feeling around the frame – top‚ bottom‚ and sides – for drafts. Pay close attention to the areas where the weatherstripping makes contact with the door slab and frame.
If you detect drafts‚ re-examine the weatherstripping installation‚ ensuring it’s properly seated and free from gaps or tears. Adjust the door closer to ensure a tight seal when the door closes. The manual details specific adjustment procedures for the closer mechanism. Also‚ verify the frame is square and level‚ as an uneven frame can compromise the seal. Addressing these points will maximize energy efficiency and comfort.
Addressing Common Installation Issues
During Andersen 4000 Series storm door installation‚ some issues may arise. A frequent concern is hinge alignment; if the door doesn’t hang straight‚ revisit the hinge attachment points and ensure screws are securely fastened. Another common problem involves difficulty with the Quick Change System – verify the glass or screen panel is fully seated within the retaining tabs.
If the door doesn’t close smoothly‚ adjust the closer mechanism according to the manual’s instructions. Air leaks often stem from improperly installed weatherstripping; ensure a tight seal by reapplying or adjusting its position. Remember the manual provides detailed diagrams and troubleshooting steps. If issues persist‚ consult Andersen’s support resources for assistance.
Warranty Information and Support
Andersen Corporation stands behind its 4000 Series storm doors with a comprehensive warranty. This typically covers defects in materials and workmanship for a specified period‚ varying by component. Review the included warranty documentation carefully for complete details‚ limitations‚ and transferability information. Proper installation is crucial to maintain warranty validity; retain installation records.
For support‚ Andersen offers a wealth of resources. Their website provides FAQs‚ installation guides‚ and troubleshooting tips. You can also contact Andersen’s customer service via phone or online chat for personalized assistance. Keep your product information handy when contacting support to expedite the process. Andersen’s commitment ensures a lasting‚ trouble-free experience.